Regarding outdoor survival during an emergency, humans require four factors to preserve and keep themselves safe. These survival priorities include fire, water, food, and shelter. Our survival prospects are poor if we do not achieve these requirements.
Having a shelter to which you can go anytime you need it is an incredible asset that anyone can have. It is even a better advantage because the woods include food you can hunt and other resources you can use. So, in this article, I’ll explain how to build a waterproof shelter in the woods.

How to Build a Waterproof Shelter in the Woods
It’s one thing to construct a shelter to keep the sun at bay and quite another to have it keep you warm. The ultimate goal is to build a waterproof shelter from natural materials.
First and foremost, it is all about location. Avoid low-lying areas where water can collect. Build close to your building supplies to save energy and avoid exposed places with high winds. Let’s see it in a more detailed way.
Choose a location
The first stage in constructing a shelter is deciding on a location. Location is crucial because you want to choose a place with all the required resources.
Accessibility to a water supply, predators in the area, geographical threats, and exposure are all crucial factors to consider when picking a place.
When choosing a place to have access to water anytime you need it is vital to consider without relying on water from your residence or the store. Any supply of water that you may use for safe drinking after filtration is a significant asset to the permanent shelter you decide to build there.
It is also critical to consider local predators. Look for indicators of what animals are nearby while choosing a spot for your shelter. Look for animal tracks or droppings to learn about the creatures that live nearby.
Suppose you discover an excessive amount of bear droppings. In that case, you may wish to relocate so that you are not attacked, or the shelter is destroyed.
Barrier the ground
Begin by constructing a rectangle structure out of logs. Fill in the frame with detritus-like dry leaves or pine branches. The debris will act as insulation, keeping the ground from absorbing heat away from the body. This is critical since most body heat is lost through ground transfer.
Frame the shelter
It’s critical to remember that this form of shelter is only for emergencies. As a result, the shelter cavity should only be large enough to accommodate your body. An A-frame provides the most efficient design for this kind of shelter.
Adjust the sticks on either side of the shelter so that they meet at the top. Continue to build the frame by arranging the sticks from front to back. It is necessary to go outside the box and be inventive in how the sticks lock together during this phase.
Build it up
Once the frame is built, you should apply a heavy layer of debris to the whole outside of the shelter. This is the most time-consuming aspect of natural shelter construction.
Pile up leaves, sticks, and branches all over the frame. This barrier should be between 4 and 8 inches thick and thick enough to keep the rain out and the inside of the shelter dry.
The most important thing to remember while building a survival shelter is that it is intended to keep you alive rather than comfy. Natural debris shelters are often wet and cold on the inside, with some leakage. Being uncomfortable but alive is preferable to the alternative.
Read more: How to Build a Hut in the Woods

Types of Shelters
You can only build what you can afford. Fortunately, some shelters only employ natural materials you can find around you in the woods.
Wickiups and lean-tos are examples of stable shelters. These waterproof shelters are all excellent alternatives, and anybody can benefit from at least one, depending on their climate.
Wickiup
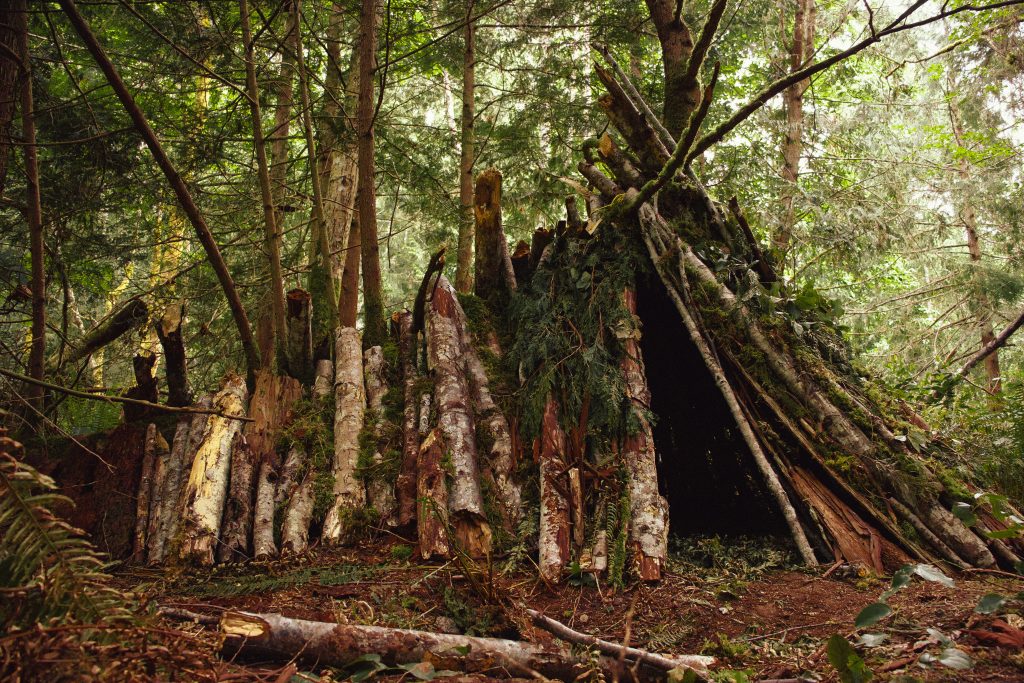
Many people have never heard of a wickiup shelter, although it is an excellent long-term shelter solution. It is a shelter composed of forest materials comparable to a teepee. This refuge is ideal for people who don’t want to spend much money on a shelter.
This shelter is also incredibly simple to construct. Another advantage of this shelter is that you may make a fire within it without destroying it. Once you’ve decided on a location for your shelter, make sure it’s clear of debris.
Then, the tripod is constructed using three long, robust branches that will bear the majority of the weight. If you see it appropriate, begin to add more branches to the shelter. All the spaces do not need to be filled at this time because you will fill them with insulation later.
Lean-tos
A lean-to shelter is the last type of shelter you can construct. A lean-to shelter is an excellent choice because it is inexpensive and simple to construct.
You’ll need branches for the frame, something to lean against, such as two trees or a wall, and a tarp or coverage to cover the frame. By orienting the shelter against the sun or wind, this shelter is suitable for wet, windy, or sunny situations.
Read more: How to Find a Spring in the Woods
What Makes It Waterproof?
Your shelter must be waterproof. You can build a shelter using a tarp or plastic dust sheets. In the absence of these, you will need to collect many leaves.
Blankets or cushions to line the floor will keep you warm and dry. Make your shelter as huge as you require. If you don’t have much room to work with, strive to make it as large as possible.
This will offer you plenty of space to walk around and will allow you to locate a spot to keep your tools and supplies when not in use. You’ll also need enough space for your sleeping bag and pad, as well as your food, water, and other supplies.
Conclusion
Now that you know how to build a waterproof shelter in the woods, it’s time to put it into practice. Go outside and construct a waterproof shelter. It may take a few attempts, but you’ll get it! Your survival tools, knowledge, and training will prepare you for any situation.
