One of the most important skills people lack nowadays is finding their way to safety independently. To their great luck, many hikers, outdoorsmen and women, and preppers still use compasses and maps to find their way. However, they still require a technique to calculate the distance traveled from the last waypoint to determine how far it will be until the next.
Ranger beads are extremely helpful in situations like this one. Although they do not provide an exact distance and have several other restrictions, the ranger beads are a helpful tool. So, in this article, I’ll explain in depth about ranger beads, specifically, what are ranger beads and how you can use them.

What Are Ranger Beads?
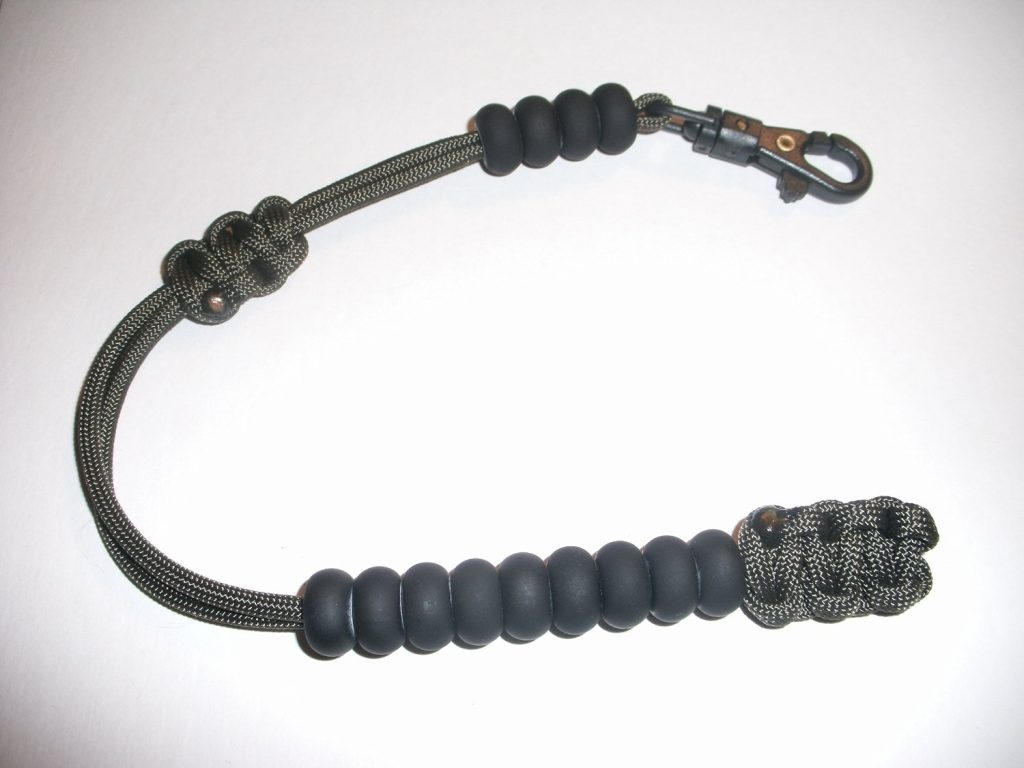
Ranger beads, also known as pace counting beads, are manual counting equipment primarily used to measure a traveled distance using a pace count. It can be seen in orienteering and military land navigation.
Since Army Rangers are regarded as experts in land navigation, these pace-counting beads are commonly referred to as ranger beads. In most situations, this pace-counting gadget comprises 13 beads strung together on a string. The beads are likewise divided into two parts that are knotted together.
In most cases, you can use nine beads in the lower area and at least four in the upper section. A loop can also be seen at the top. This is excellent for attaching the tool to your gear using a simple larks head hitch.
How to Use Ranger Beads
Measure the distance
Measure 100 m; count the number of steps it takes to walk 100 m. For example, it could take 65 steps to cover 100 m. Only count steps when your right foot touches the ground. You might calculate the distance for level, uphill, and downhill terrain. Then, add them all together and write the total down.
Move the beads
You can start navigating after you know how many steps equal 100 meters. Count your steps as you begin the first navigational leg of your journey. When you’ve reached the number of steps required to reach 100 meters, slide the bottom piece bead down the cordage.
Then, you begin numbering again from the beginning. Move another bottom portion bead down the cordage after another 100 meters. You would now slip down two beads. This equates to 200 meters traveled.
Repeat the technique until all of the lower section 9 beads are down. This would imply that you had covered 900 meters. When you’ve traveled another hundred meters, slip the top bead down. This indicates that you have traveled 1,000 meters or 1 kilometer.
The bottom beads are then reset by moving them back up to the top. Repeat the top and bottom bead counting and sliding until you reach 4-5 kilometers. Reset all beads and try again for a longer distance.
Read More: What Side of a Tree Does Moss Grow On?
Where Can You Get Ranger Beads?
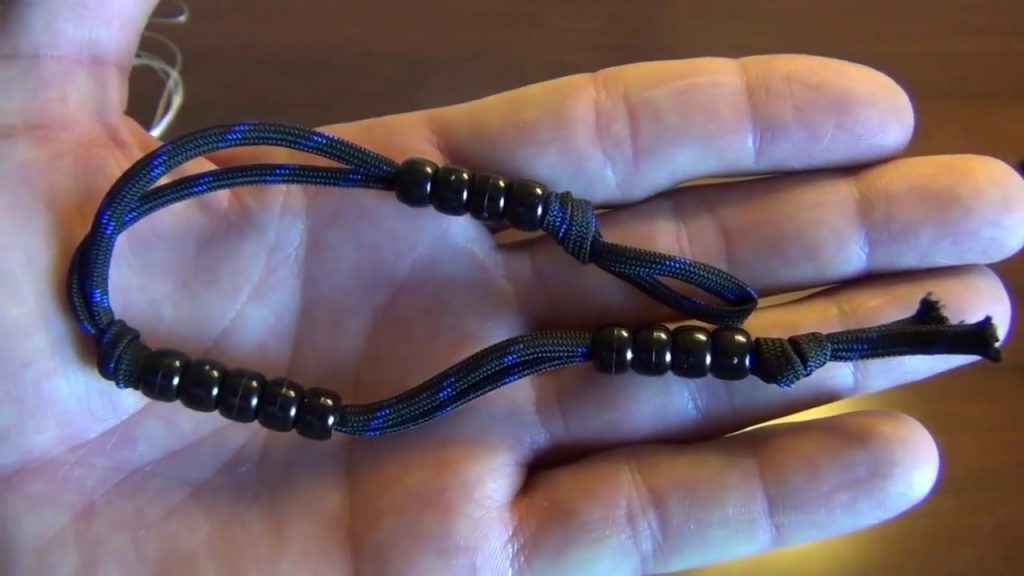
The ranger beads are available in different unique styles. They are available in various colors and with different unique beads, or you may create your own ranger beads using a piece of paracord and some beads.
Make your beads
Remove the strand and fold
Remove the interior strands of the paracord; keep in mind that you only need the outside sheath. Keep the inner strands for another project. Then, you should fold the paracord in half.
Bend the paperclip
Bend one end of the paperclip into a small hook, and the rest of the paperclip can be left as it is. This will keep the beads from escaping while you load them onto the paracord.
Needle nose tweezers may be useful in holding the paperclip behind the bead you are currently pressing onto the doubled-up paracord.
Arrange the beads
Incorporate the beads into the paracord. You will eventually be able to thread all your beads onto the paracord.
Separate the beads
Separate nine beads for the paracord’s bottom and five for the top. Three well-placed overhand loop knots later, you’ve got a 5-kilometer-long set of ranger beads. You want to leave enough space between the knots and beads to slide them up and down.
Tips and Ideas on Counting
- Connect the loop to a carabiner or a backpack loop with a larks head knot. You can also wear ranger beads on a lanyard or belt.
- When hunting with a gun or bow, stopping with your right foot slightly behind is advantageous. Since you are in a better position to fire with your right foot somewhat back while you are halted. Begin with your left foot and count when your right foot touches the ground.
- Some people will leave the beads down until they have indicated the greatest distance they can indicate and have all been slid down, rather than re-setting and sliding the beads up again. Then, slide them up and down to count up and down. This might become complicated if no attention is paid to the direction the beads are carried through.
- If you don’t have pace beads, stones will suffice. Transfer from one pocket to the other when you’ve finished the steps.
Read more: How to Build a Hut in the Woods

Conclusion
Although they have a few limitations, using pace-counting beads is a helpful technique to keep track of the distances traveled when you are exploring. Use the beads with a map, compass, and your natural navigation ability. Learning to use ranger beads provides you with yet another tool that may be used when you are out in the woods.
Many people would instead use a pedometer so that they don’t have to count their steps. Ranger beads are more cost-effective, easier to produce, and don’t require batteries. Even while we typically use a GPS to locate our way, that does not mean we should be incapable of using a map or compass in an emergency.
If you go hiking frequently, it is well worth your time to learn how to make and use ranger beads at least once so that you will have the ability to do so in case you ever need it. I hope that you learned what are ranger beads and how to use them since they’ll help you so much if you’re a hiker.
